Replacing escape hatches
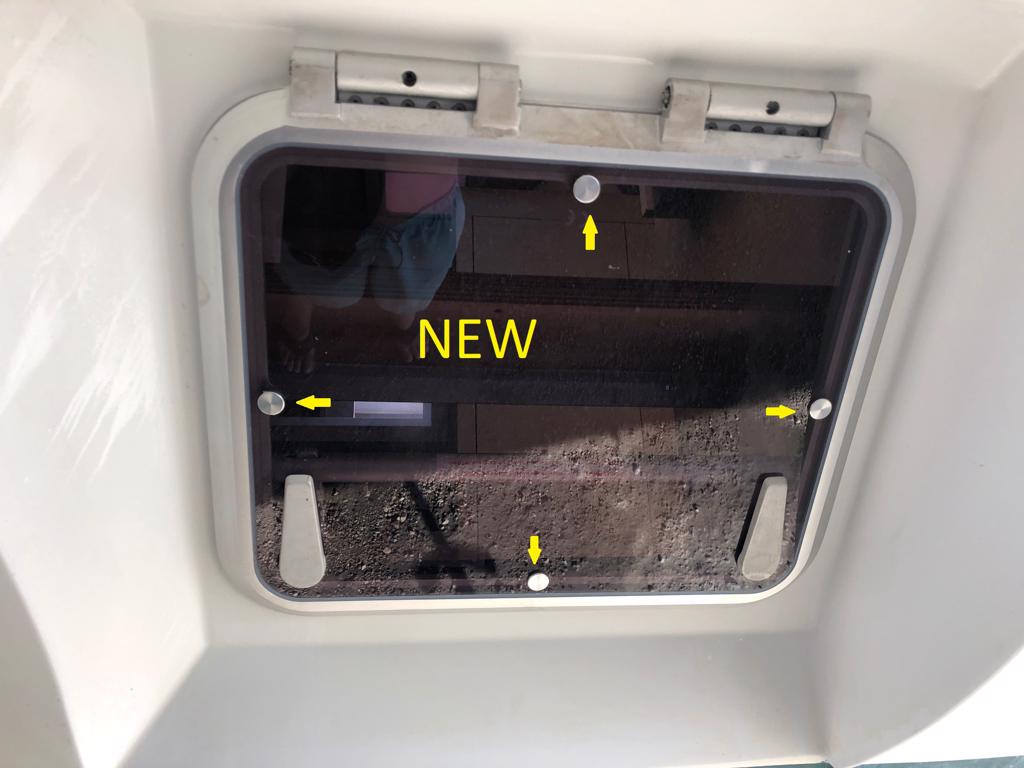
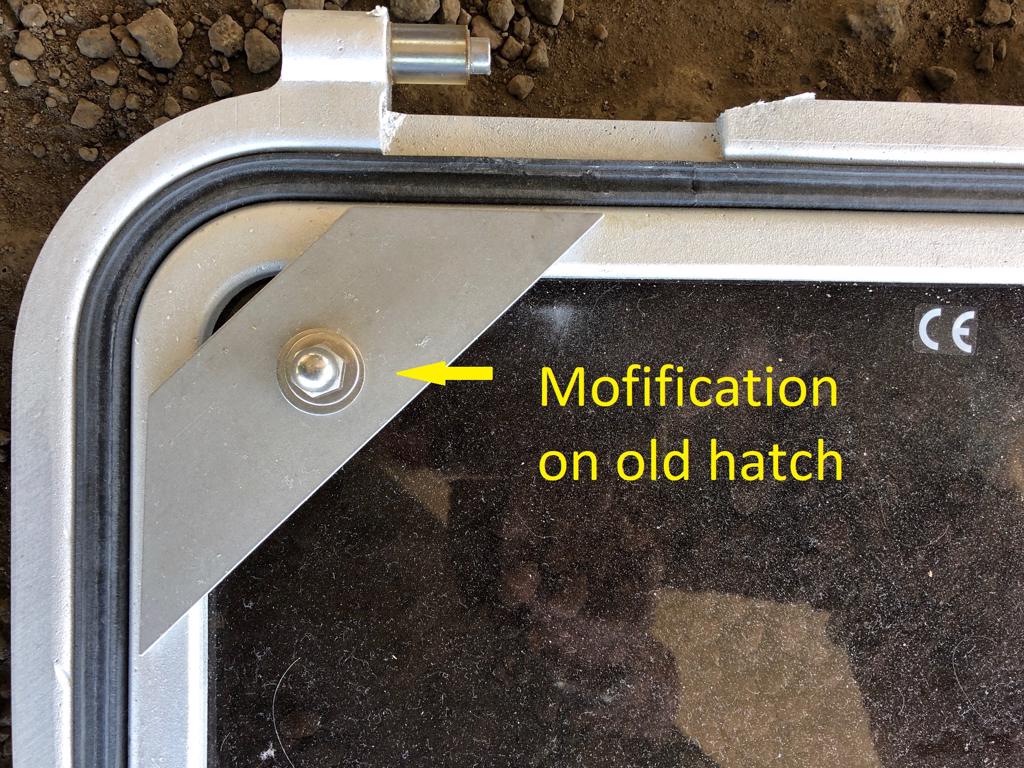
We finally received new Goïot escape hatch lids. I had reinforced the old ones so technically it was not necessary to replace them. But just keeping them on board taking up valuable wine storage space does not make sense. I also want to be sure that the insurance company is happy. Goïot made a nice video showing how to remove the old lids and installing the new. It takes them just two minutes to remove the old ones. Yeh right. It took me two hours…
See the video by clicking this link:
Let me explain why it took me so long….
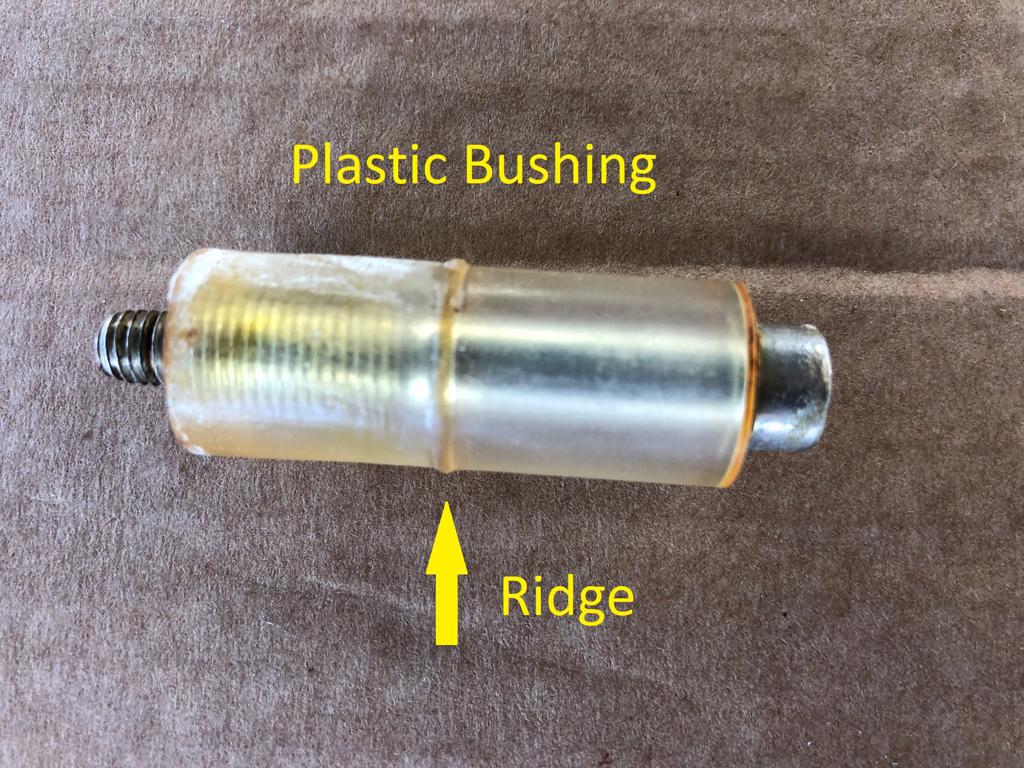
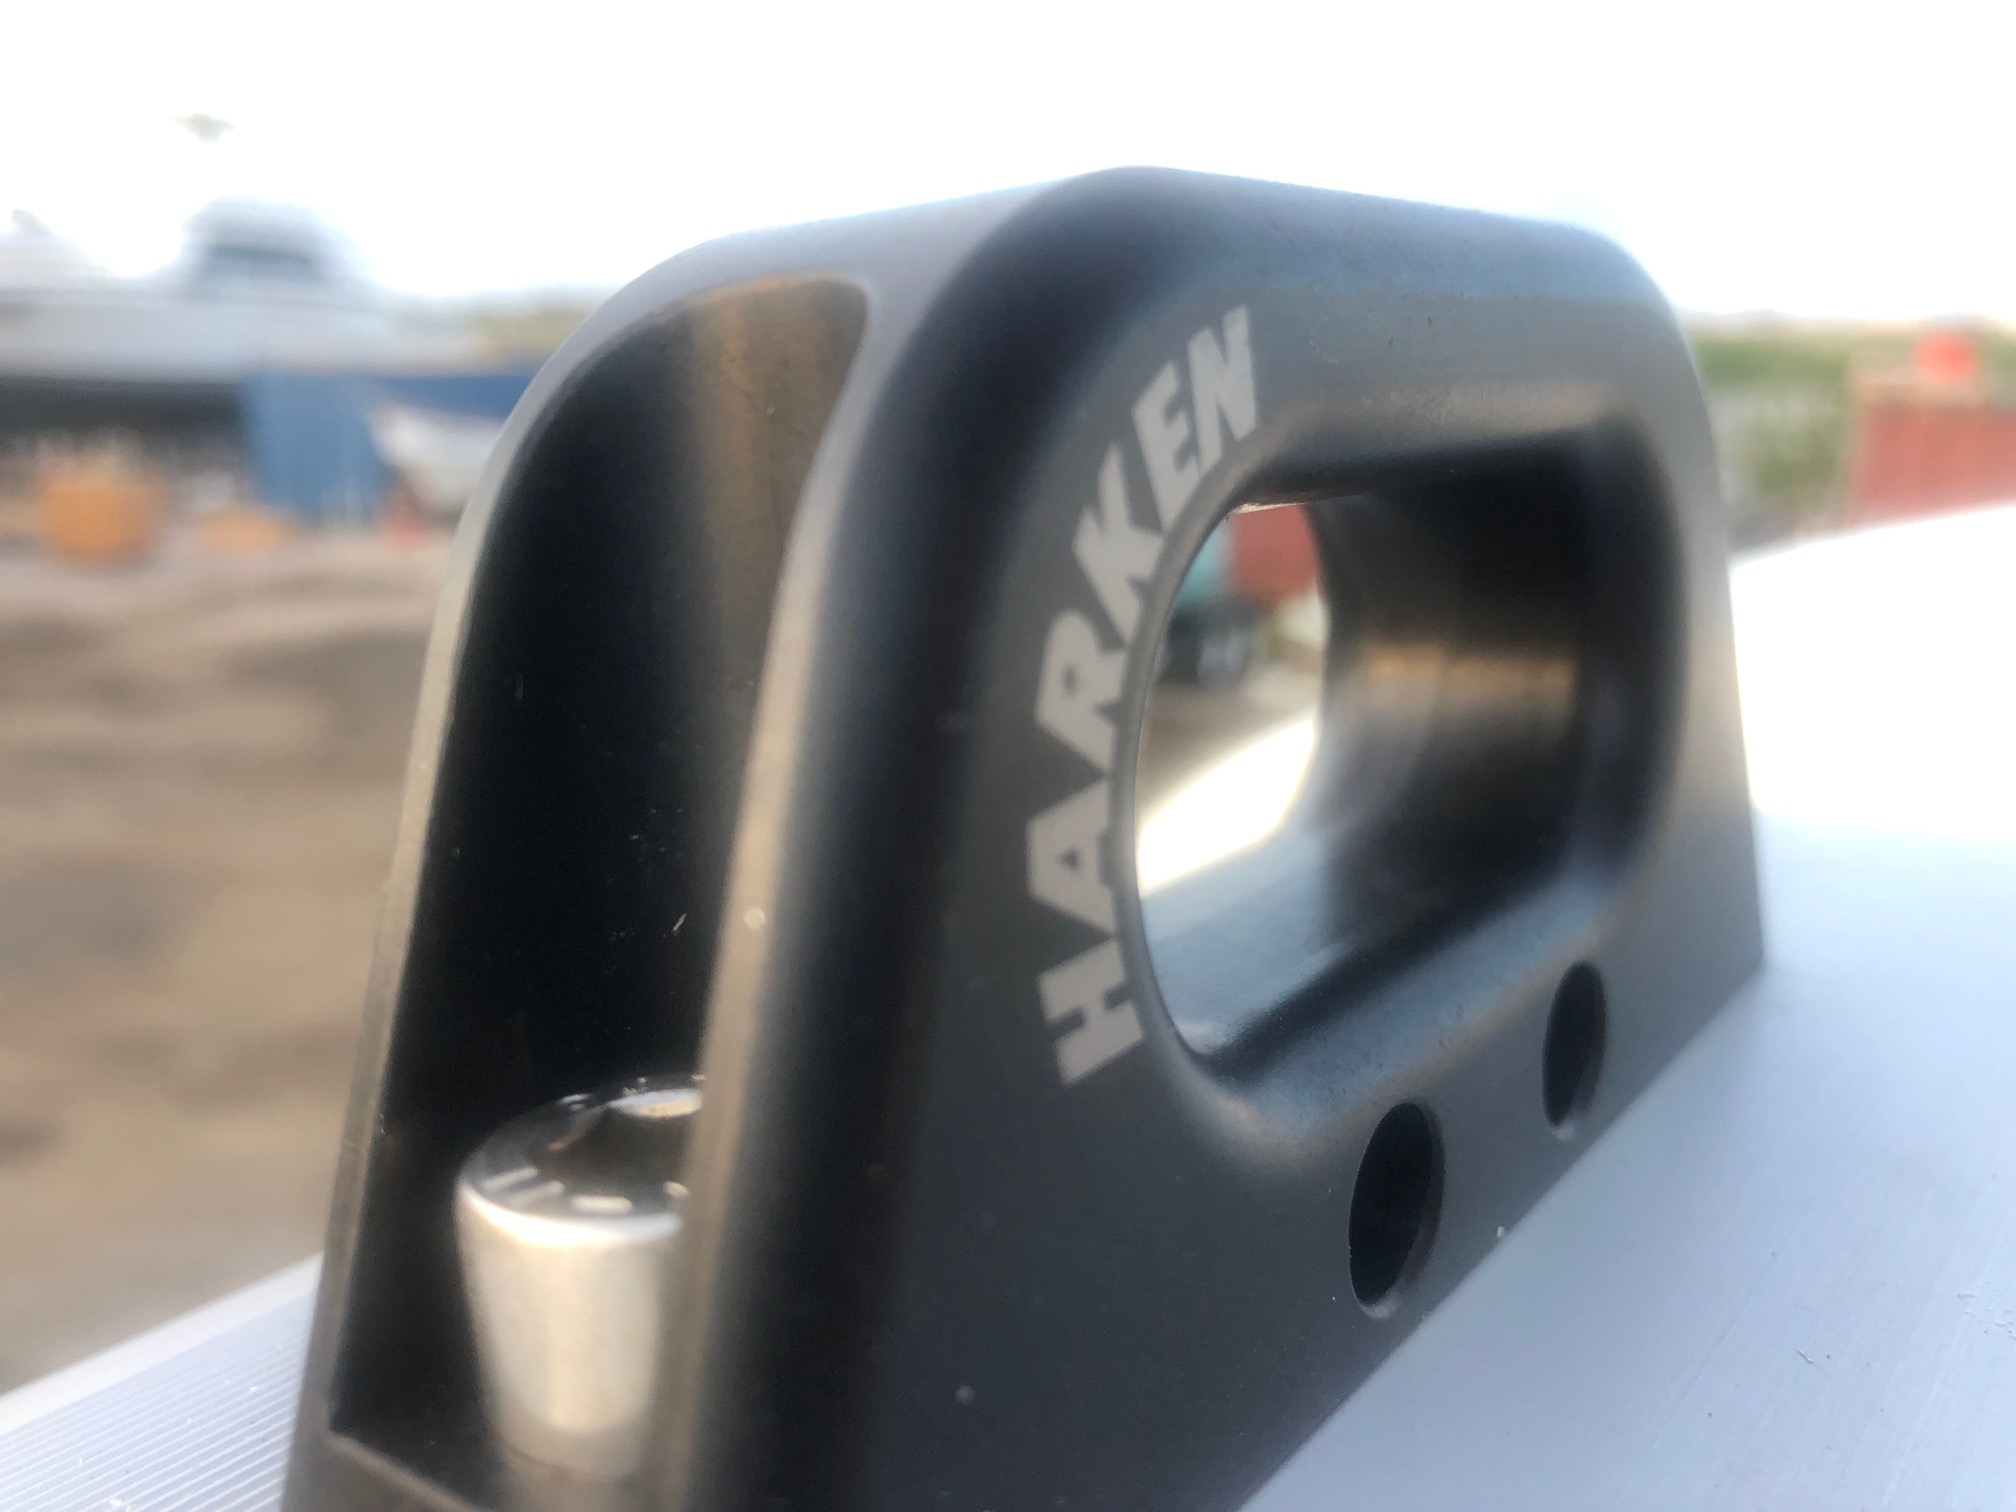
The hinges of the lid consist of lugs and rubber bushings with a bolt through the middle. By tightening the bolt, the bushing expands. This keeps the bushing in place and creates the friction to keep the lid open. Not functional in our application, but that is just the design. This can clearly be seen in the video.
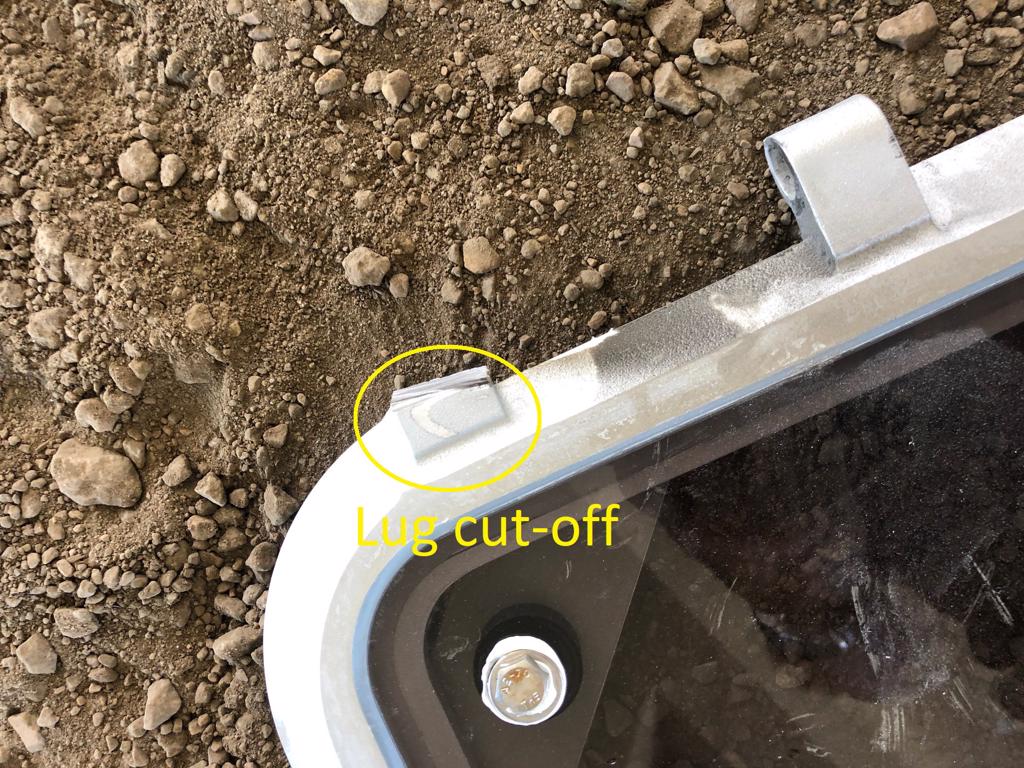
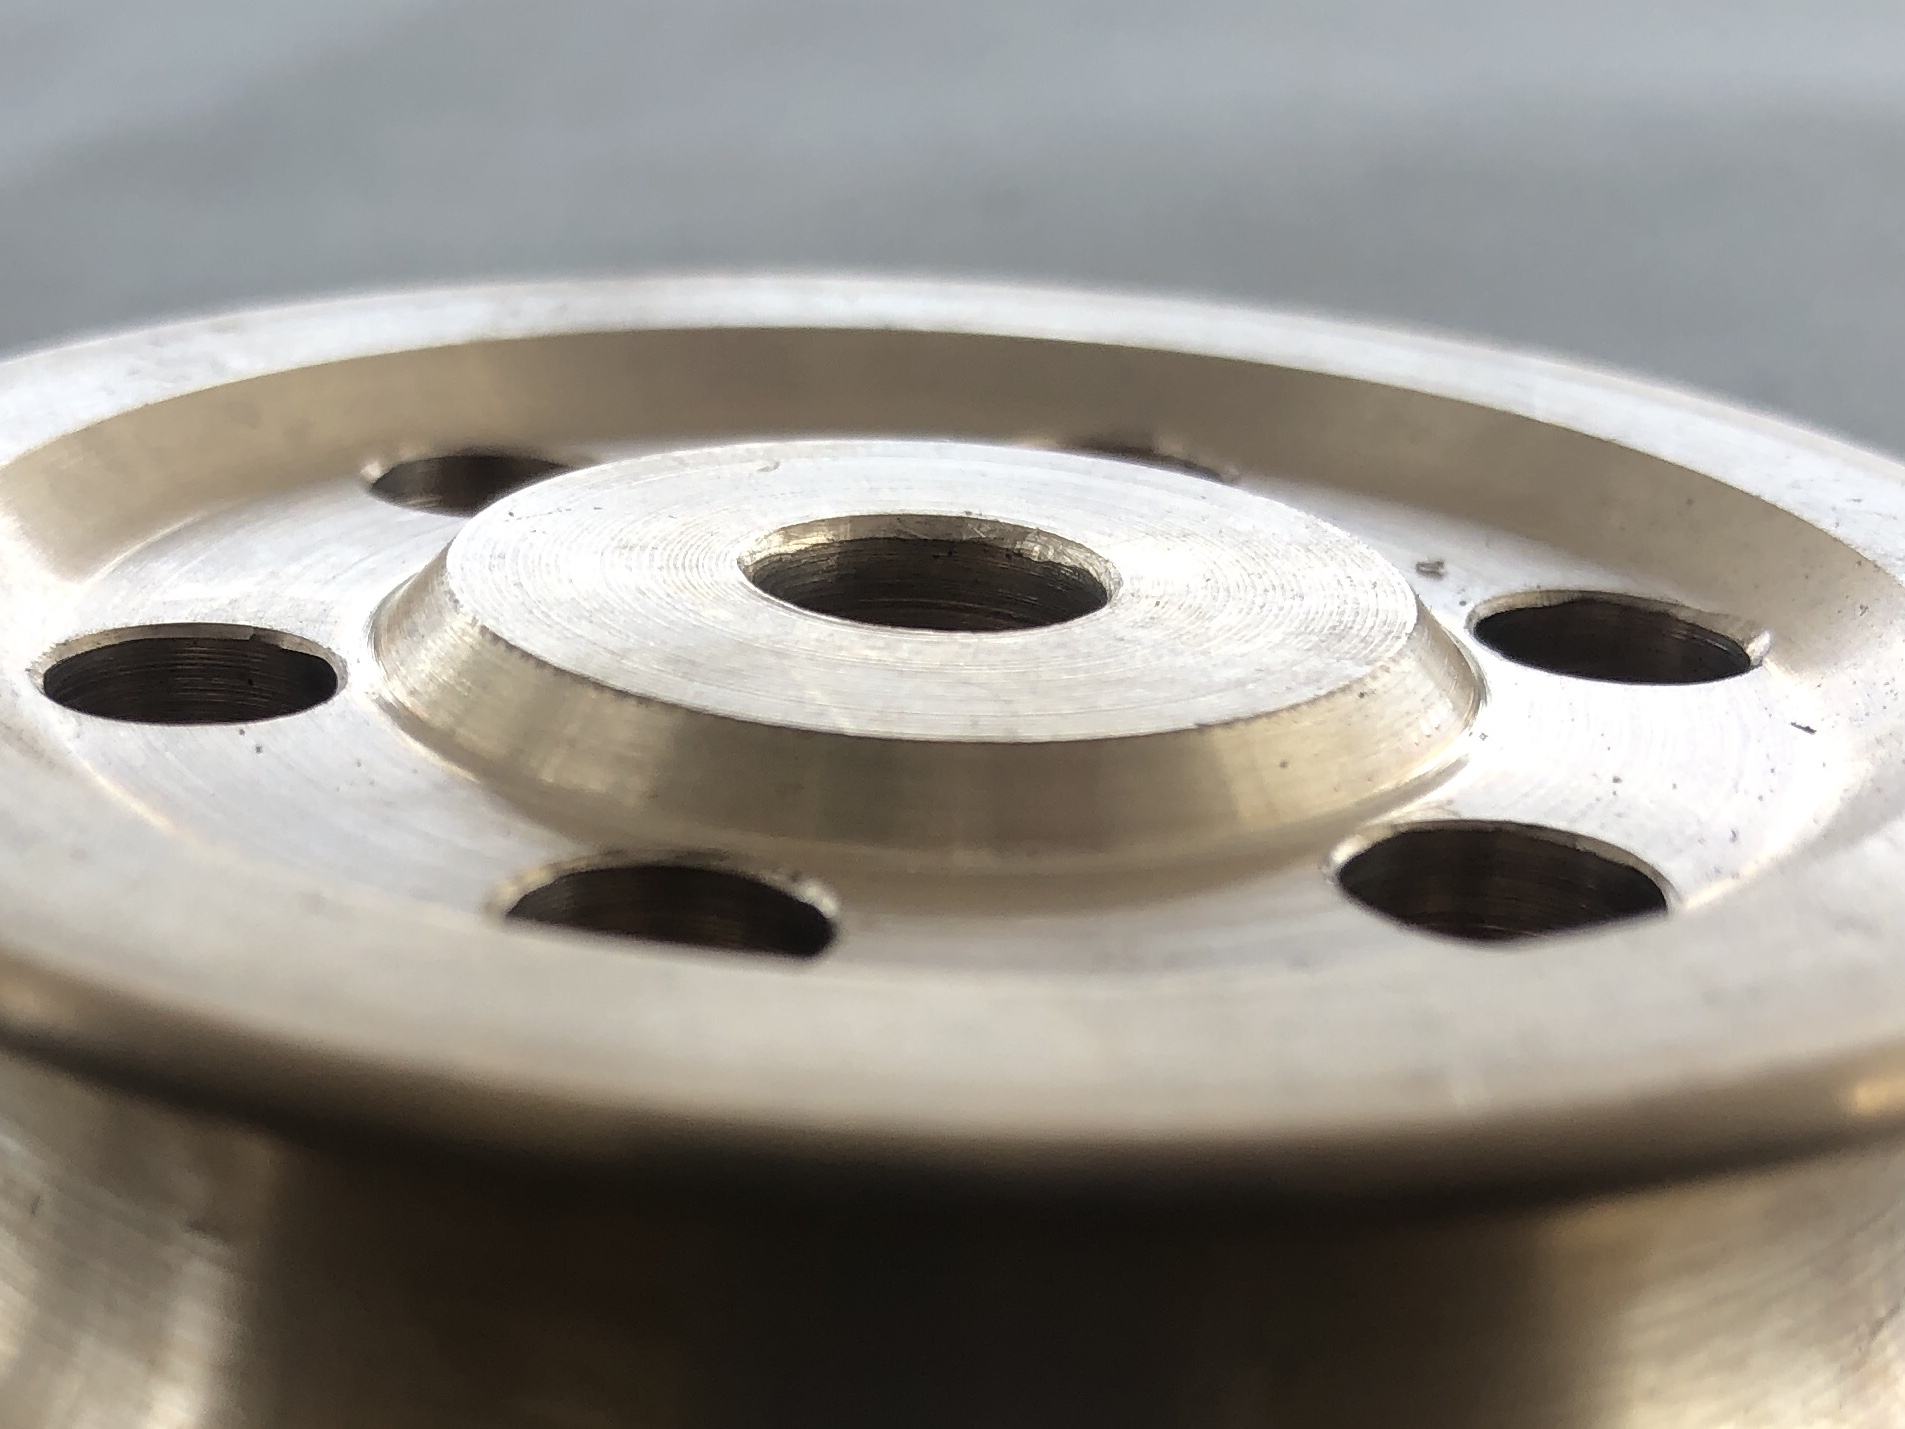
The new lid came with black rubber bushings. The old hatch however was fitted with a clear plastic-type bushing. The problem with these bushings is that when you tighten the bolt, the plastic material will not only expand in the aluminium lugs, but also in the tiny gap between the lugs. Over time this creates a small permanent ridge on the bushing which prevents it coming out. You can hammer all you want…..forget it.
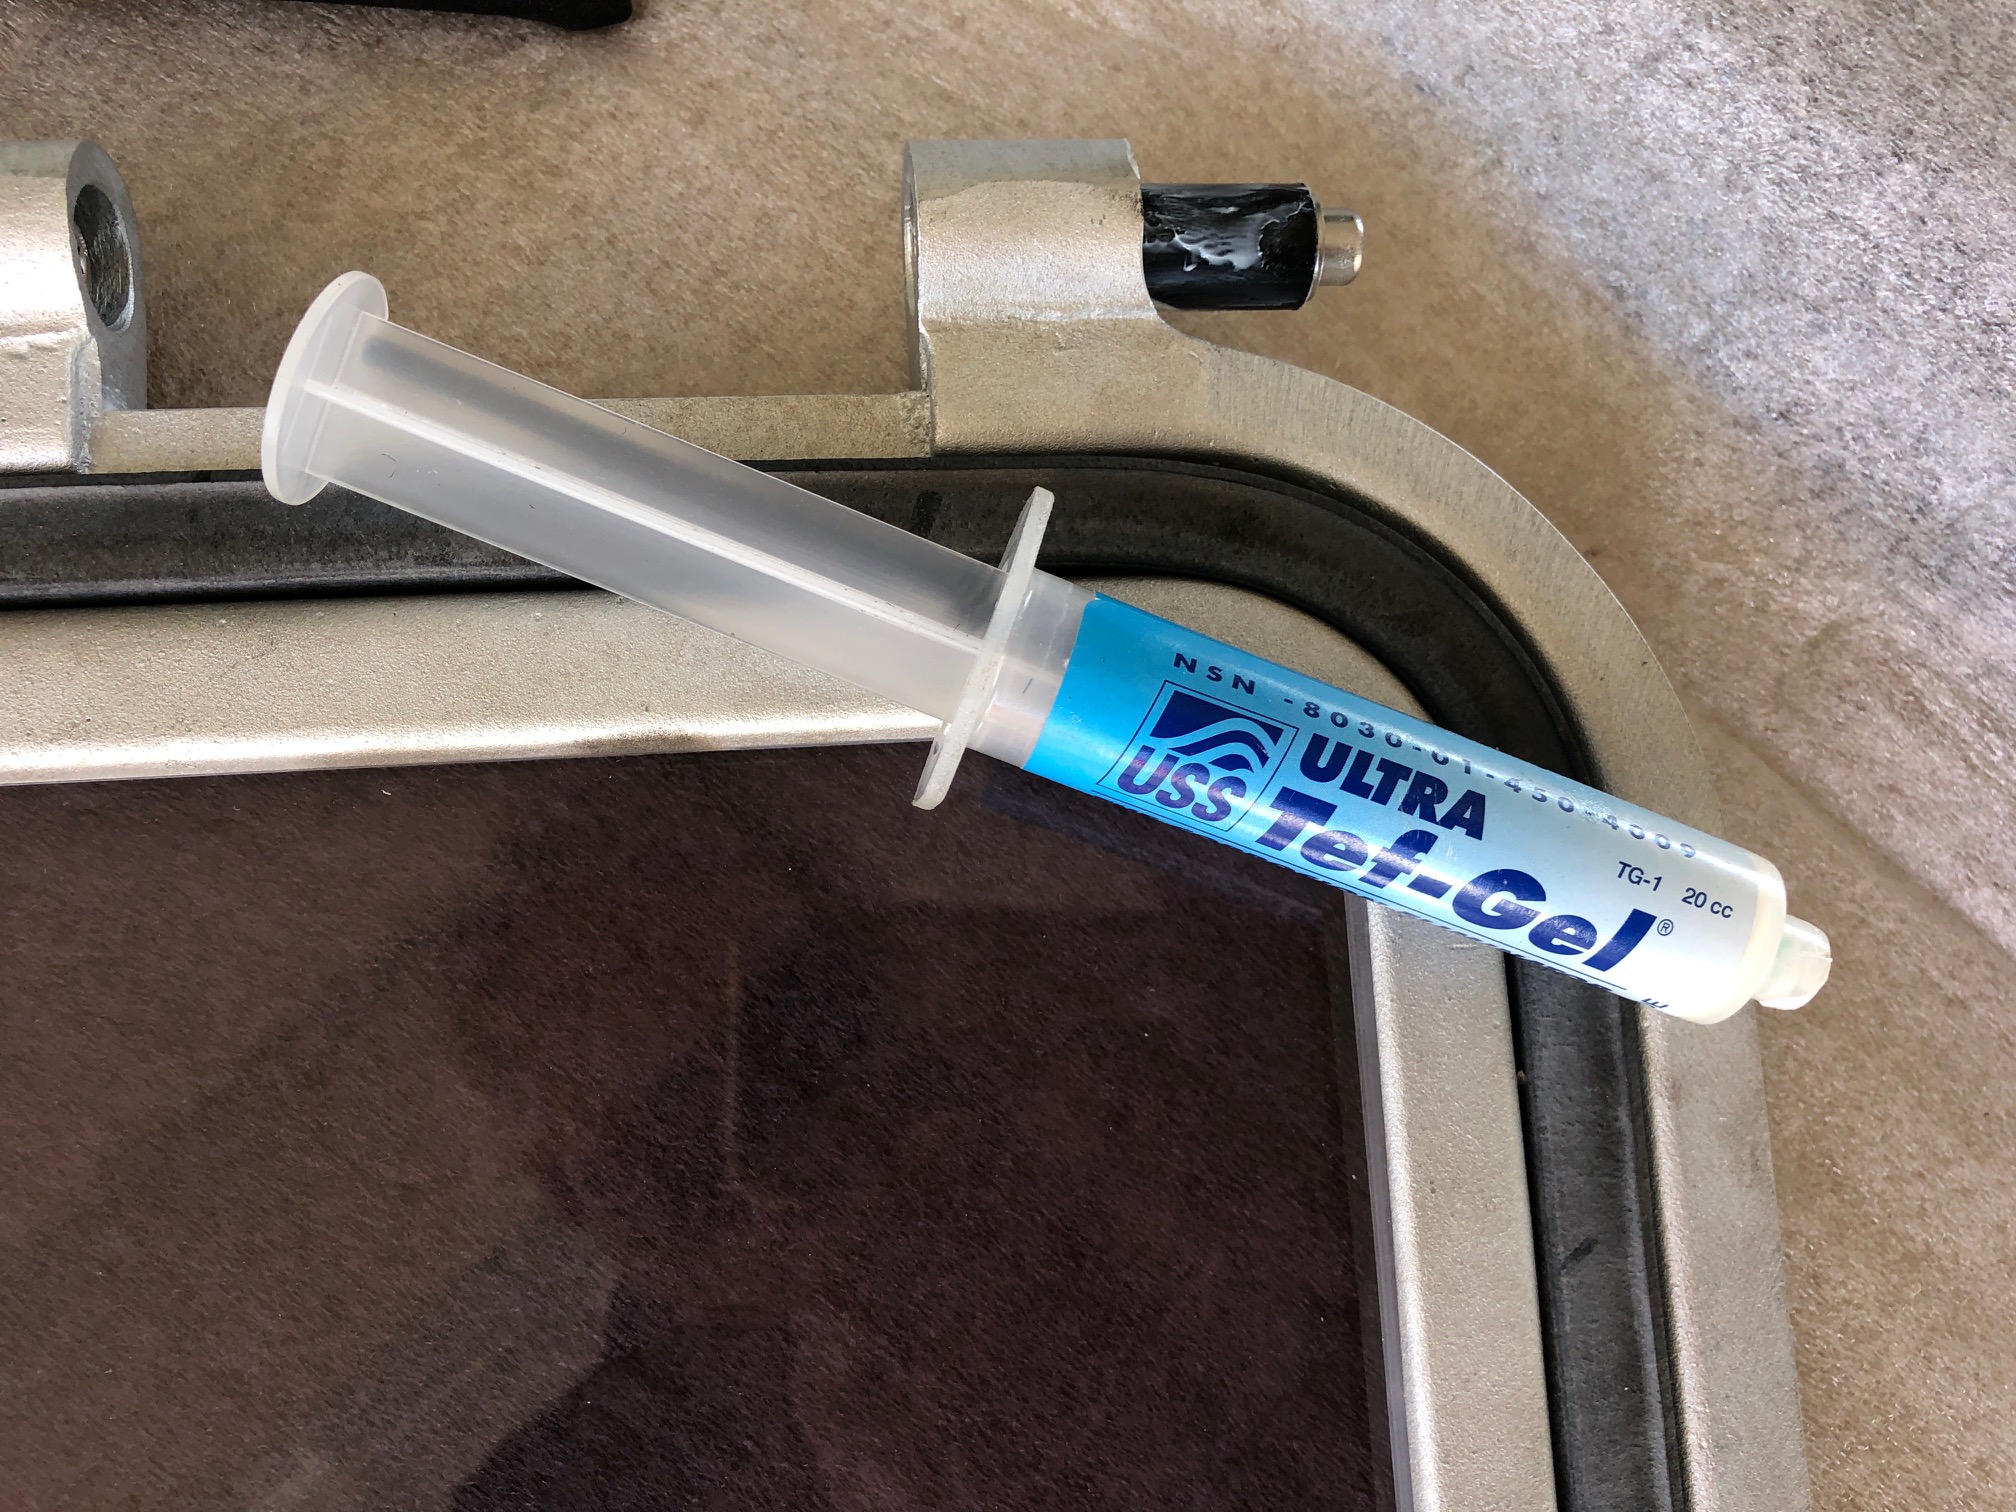
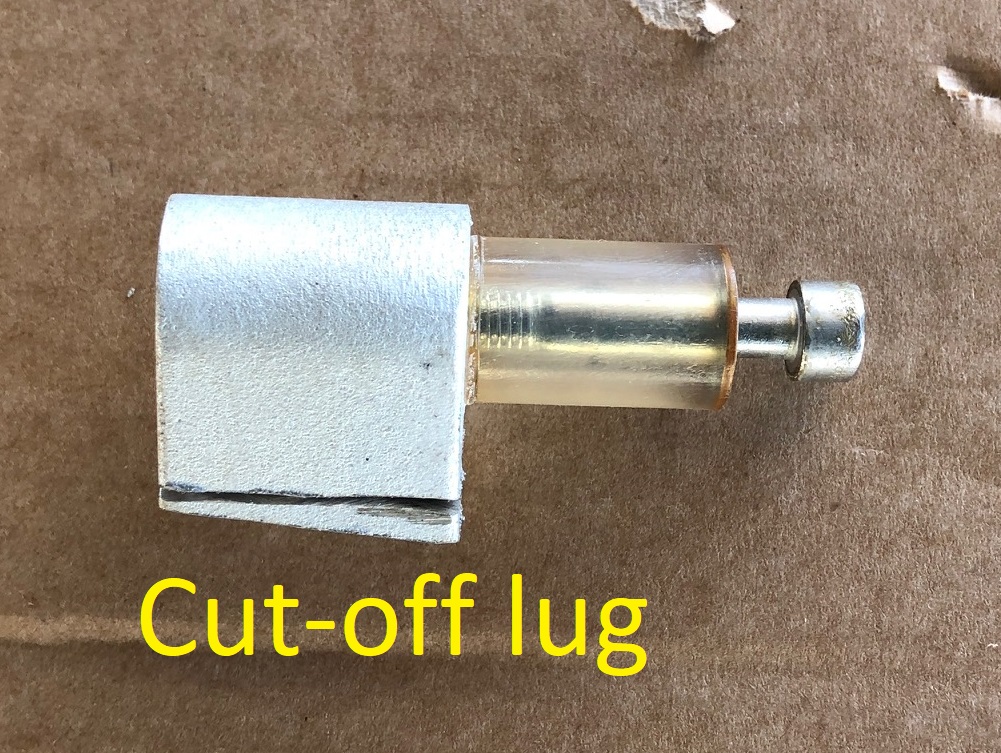
The severity of the problem may depend on the tolerance between the slugs, so it may vary from hatch to hatch. On one lid three bushings were frozen. On the other lid two. I tried everything, WD40, a bigger hammer…. The only solution was to grind off the lugs. Installing the new lids was easy after this ordeal. It helps to grease the bushings, else they will get stuck. I used Tefgel to lubricate the bushings. This will also protect the aluminium where the anodization is gone after hammering with the supplied pin.
When we received the hatches the boat was on the hard, so at least I had good access to them. If we would have been in the water, I may have been tempted to replace them while afloat. In the video it looks so easy……
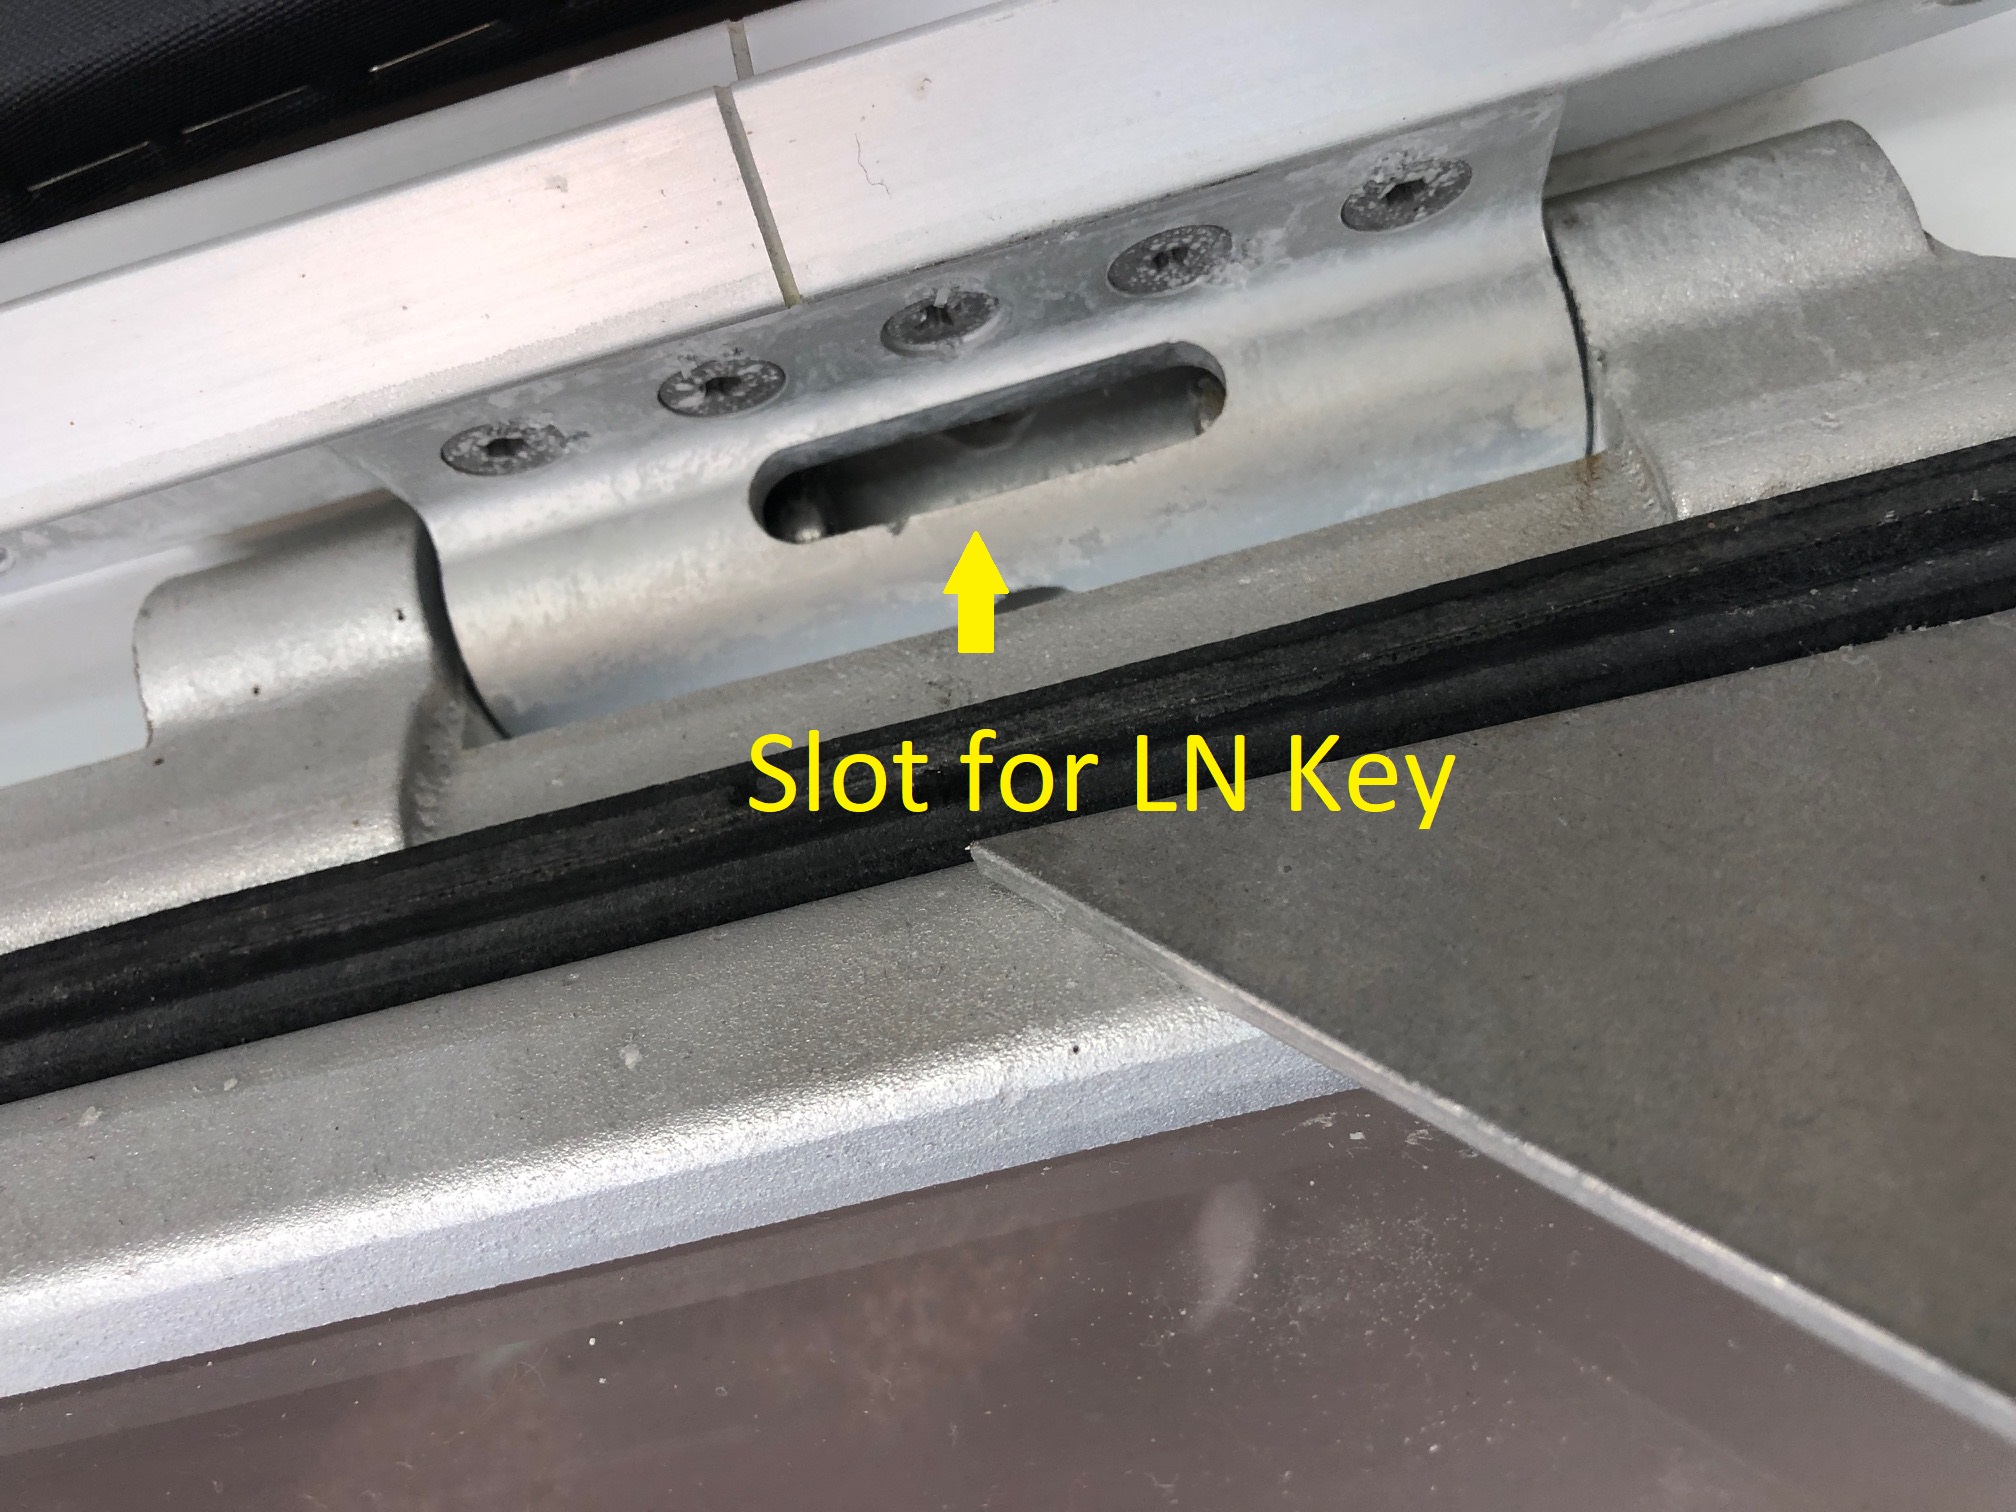
When I looked at the video, it appeared that they inserted the LN key in the hole that is visible on the hinge. But that is not the case. There is a slot at the back side where you should insert the LN key.

Leave A Comment